Color me cheap

Emily is 32 and lives in Boston with her funny boyfriend. She is a beauty school dropout who cannot stop cutting her own hair. She can be found obsessing about cheese and her cat at Pretty Crabby or talking about products endlessly at Tallulah Blue. She has not seen her real hair color since 1990.

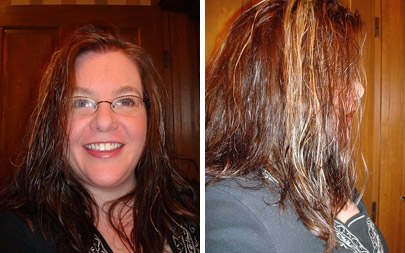
When I was 15, I started using Sun In. That was all it took for me to become hooked on the cheap and easy hair dye in a box. Ever since I have been buying and trying every kind of dye you can get at CVS, Target, and the like. I have never had my hair dyed professionally. While I can easily justify spending $200 on a new handbag, it is really hard for me to spend that much on my head. I am not sure why this is. Maybe because it doesn’t last the same way a new leather bag does. After six weeks your hair has grown out and faded, but man, that bag is still so pretty.

In the 18 or so years that I have been dying my hair, I have found a few favorite dyes and now I am here to share them with you! You can learn from the times when my hair was so bleached out it was blue (true story) or when the brown decided not to hang around and it all ended up sort of orange and… splotchy. Please, learn from my mistakes. Your hair will thank you.

My favorites:

Garnier Nutrisse Hair Color – Sometimes I stray and use one of the below but I always find myself coming back to Garnier. It’s so easy and it has this Fruit Oil Concentrate capsule which you add to the dye and it all smells really good (mainly because the smell of the oil is covering the smell that most dyes have, ammonia). This is the one I used most recently, a brown which is not brassy or reddish (I try to stay away from red undertones because I am so fair and I can end up looking like an orange). I wish this one came with more conditioner though, it has a little packet so you have about enough for one use.

Cost: Between $6 and $7 Degree of Difficulty: Easy to Medium, three tubes to mix together. But nothing very tricky about it.

Loreal Feria – This dye claims it has “multi faceted shimmering color”! I don’t really know what that means (well, yes, I do. It’s like wearing sequins on your head, am I right?) but the color sure looks nice! I have found this one to last a long time and it also has a nice amount of conditioner which lasts for a few shampoos. I like Feria for when I go blonde in the summer, it is not as flat as some of the other blonds I’ve tried. I think because as well as taking the color out of your hair (bleaching it) it deposits a few different colors back on top – creating the afore mentioned “multi faceted” whosee whatsit.

Cost: About $10  Degree of Difficulty: Easy (Just two tubes to mix together, and then put on your head Voila!)

Loreal Couleur Experte – This is another one I use a fair amount. I also turned my mother on to this and she does it herself at home. This is the one you have seen in commercials and magazines with that freakish looking silver wand. (Seriously, does my hair dye also need to resemble a sex toy? Probably not.) That silver wand is one of the three tools you get to add highlights to your hair. First step is dying your whole head with the main color and then the second step is highlights.

The thing about the highlights is that they give you way too much of the lighter color. You should do what my mom does and mix it all together and then throw AT LEAST half of it away. No one (except perhaps Christina Agulara) needs so many highlights. The second tip I will give you is do the highlights SPARINGLY. Put much less than you think you need on your hair. I would suggest doing four small pieces of hair (evenly spaced along your part, or all towards the front) then rinsing the dye out and if you feel like  need more you can do more. Once you do too much, you cannot go back. Better to do less and add more later, the bleach will not go bad. You can even put it in Tupperware and put it in the fridge and go back and do some more tomorrow. At the worst, it will just seem like you spent a day at the beach. My what gorgeous highlights you have!

Cost: $15 – $20 Degree of Difficulty: Medium (Due to the tools, mixing and steps. But you can do it. Really. You can!)

Good luck! Your wallet will thank you and so will your head.

hair thursday makeover 43

We need more testosterone around here, don’t you think?

Meet The Moons.

This Oklahoma City-based band is in need of some Hair Thursday help.

They’ve got some darkish blondes:

They’ve got some brunettes:

And they’ve got a woodsman who fled into the mountains when he was wrongly accused of murder:

Since we’re dealing with many (cute! musician!) participants, let’s get to it. Most of these haircuts are on the shorter side because 1) I strongly believe that the majority of musicians don’t need to look like trannies/80’s rejects/homeless, and 2) Oklahoma is hotter than shit in the summer months.

Shall we start with Brian? Brian’s transformation is probably the most important, mainly because he is a dear friend who could sabotage me with vicious threats of blackmail if I steer him in the wrong direction. The world does NOT need to know what Brian has witnessed over the years in regards to yours truly. Also, I very much like his wife and darling little boy.

Let’s look at some options for Brian.

Option #1 would give Brian some great volume at the crown…and I’m kidding. Those are horrible.

I’ve seen Brian with all different hair lengths. And although I do think leaving a little length would be best, Brian, GET THAT HAIR OUT OF YOUR FACE.

How about something like this?

This style leaves a little length on the sides and back, but keeps the front short enough that it can’t hang down into the eyes while he is drumming away. Perfecto.

How about Aaron?

Am I the only one who senses a modified Blue Steel pose here? Aaron has the easiest transformation – all he needs is a styling wax to give texture and mess it up a bit. Bumble and Bumble Sumotech or Paul Mitchell Grooming Pomade would work very well.

Mark:

Mark’s style reminds me a little bit of Michael John’s hair. (WHAT? I enjoy a little American Idol from time to time.) However, I TOTALLY envision him with a shorter, 50’s Mad Men-type style. The style in the above photo would look so fantastic with his features. (So would the suit, but I’m probably pushing it, yes?)

Michael:

To make Michael’s densely thick hair look like the above style, I would recommend having his stylist texturize throughout his hair, as well as use a product like Fudge Styling Clay or Texture Paste to get the right amount of texture and hold.

And last but CERTAINLY not least, Chad.

And that’s where you come in. To beard or not to beard? To grow or not to grow?

First off, I must say that Chad’s hair has major potential. He’s got a lot of it, and the gray coming in on the sides is my favorite part.

(Quick sidebar completely unrelated to Chad: Men. FOR THE LOVE OF GOD, quit coloring your gray hair. It looks SO UNBELIEVABLY FAKE. Gray is sexy. Poll coming soon on that one.)

I love Keanu’s style in Option #1, and Chad’s hair could look exactly like it with a little more texturized length on the top and some shaping on the sides and back. The question is, should he trim the beard to get the overall look of Option #1 or shave it off completely like Option #2?

Decisions, DECISIONS. The future of Chad’s face is in your hands.

If you are in the Oklahoma City area, The Moons will be playing with The Uglysuit on August 1st at the 51st Street Speakeasy (1114 NW 51st Street). Make sure they look presentable, will you?

hair thursday makeover 35

Here it is, part 2 from last week! Better late than never, right?

Meet Natalie.

natalie_before2.jpg

Natalie’s hair:

Dark brown with a bleached white stripe
Doesn’t know what to do with the front part of her hair – wears it pulled back 75% of the time
Oily at the roots, dry ends
Fine hair, thin at the front. Thick, minimal wave
Spends anywhere between 5 and 30 minutes on hair
Uses round brush with a blow dryer
Ceramic straightener occasionally

I can’t really get a clear idea of what Natalie’s hair looks like in these photos. To me, it looks reddish (which I really like) opposed to a dark brown, and I can’t tell if it’s wet or not. First off, if it isn’t wet in the photo, too much product is being used.

Natalie has a patch of gray hair located on the top of her head, and has been bleaching it to create a light stripe, as you can see in the photo. Although it adds some visual interest, I would prefer to see her with the entire head of hair colored uniformly or let the gray patch grow in au naturale.

To me, her natural gray patch of hair would still create a streaked look, but she wouldn’t have to consistently bleach (read: damage) that part of her hair. Think Stacy London.

BUT. If Natalie isn’t comfortable with flying her gray flag, what about an allover color? Natalie’s hair is currently brown, but I think a dark auburn would look very nice with her coloring. Something like this:

Oh, look! It’s a Nice and Easy advertisement! (I promise, I have no sort of agreement with Clairol. I just really liked this hair color on their website.)

Wouldn’t that color look lovely on Natalie? Now that I think about it, that cut would look great too. Cutting two inches off the bottom and adding long layers in the front would give Natalie’s hair more dimension, but she could still pull it back if needed. I would recommend using a color/heat protectant before drying and using a round brush and dryer to create a smooth, shiny style.

Until tomorrow, my friends.

hair thursday makeover 26

Meet Manda. She’s considering bangs.

amanda.jpg

Manda’s hair:

Naturally light ash brown with blonde highlights. Doesn’t want to dye her hair.
Healthy, thick and super straight
Wants long hair, is considering bangs but forehead has a tendency to get really oily
Likes ponytails
Is a sucker for cheap haircuts and wants to step it up

Manda would be a perfect candidate for the type of sideswept bangs shown in the photos below.

manda_options.jpg

Since Manda has oily skin, I definitely would not recommend bluntly-cut or piecey bangs that hang forward on her forehead, but sideswept bangs that blend into the sides of her hair would give her a fresh look without the worry of “greasy-looking” hair.

Plus, sideswept bangs are a breeze to grow out. If Manda tires of the look, the bangs will look like face-framing layers as they grow (similar to the layers she already has). Might I mention how cute she would look with ponytail bangs?

Next up is Tracy:

tracy_before.jpg

Tracy’s hair:

Naturally medium brown and doesn’t want color
Straight, thick yet fine-textured and very oily
Open to different lengths
Uses a styling cream daily
Isn’t really happy with her stylist

Take a look at these options:

tracy_options.jpg

Tracy would really benefit from reducing the heaviness in her hair, as she is slightly approaching the dreaded triangle. A little more volume at her roots and crown would make the biggest difference in the overall shape of her hair. Both of these options would give Tracy’s hair so much more movement.

Option #1 is a simple, versatile style with layers around the front to add shape and keep the overall shape light and airy. I also think the collarbone length would complement Tracy’s features.

Option #2 is full of body and texture, thanks to the medium length layers cut throughout, as well as razored ends which eliminate any bulkiness. Also, she has some very minimal piecey bangs that easily could be blended into the hair.

What do you think?

Okay, let’s chat about stylists for a second.

I know all too well about dealing with mediocre stylists, having moved around several states in the past ten years.

Here’s the deal, if you aren’t happy with your stylist, DON’T GO BACK. Sure, they might wonder why you’ve disappeared, but who cares? This is your hair- the hair you have to look at every day of your life. You aren’t paying them to make your hair look decent, you are paying them to make you look and feel fantastic. When the time comes, you don’t need to “break up” with them, discuss the situation, etc. Just don’t make another appointment. End of Story.

Since moving to California, I’ve seen three stylists. The first was a recommendation (she sucked), the second was the result of tons of internet research (she sucked), and the third is my current stylist who I absolutely adore. How did I find her? I walked right up to a random stranger with amazing hair and asked who her stylist was. She gave me her number and that was that.

This is the best way to find a stylist. You see, talking about stylists on the internet is a tricky thing. Someone might think their stylist is the best ever, but their idea of a great stylist could be completely different than yours. (For instance, they might fully enjoy permed 80’s hair. You, however, might be interested in something less model-doing-the-splits-on-a-Jaguar in Whitesnake’s Here I Go Again video. Just an example.)

You need to see the merchandise for yourself, you know? Look around, check out hairstyles while running errands, having cocktails, eating out, etc. Don’t be afraid to ask! You aren’t going to offend anyone by paying them a great compliment, right? And if you love your stylist, carry some cards in your purse. When people ask about my hair, I just whip out her card. Easy as cheese.

Now, go forth and seek out great hair!

hair thursday makeover 25

This one is for all of you curly girls out there.

mariah_before.jpg

Mariah’s hair:

Natural red color
Coarse, thick, curly and pretty dry
Prone to frizz
She misses her long hair
Uses LA Looks hair gel and scrunches, air dries
Straightens with a flat iron on occasion
Lives in humid Florida

Oh, do I ADORE Mariah’s hair color! Plus, she’s in possession of some great curls. I really don’t think she should cut much off at all! Maybe some very subtle layering, but it’s just beautiful as is. Am I wrong?

Moira is a curly girl as well:

moira_before.jpg

Moira’s hair:

Brown with chestnut highlights, from a home color kit
Curly, fine-textured, normal condition
Prefers shoulder-length or above
Styles with a dab of styling cream and air dries
Uses flat iron on occasion
Wears ponytail every day

Moira definitely has some curls just waiting to make their debut. Considering Moira’s hair texture and her height (6 feet tall- she’s got LEY-EGS, she knows how to use them), I wouldn’t recommend going super duper short, but a trim with some light layering and a new product would make all the difference in the world. Also, I think she would look beautiful with an allover deeper brown hue. (I’m talking a richer, medium chocolate brown. Don’t go all goth on me, Moira.)

I know, I know. Not the most dramatic of advice.

BUT we’re just getting started over here. Both of these women need to embrace their curls, not fight them. In fact, ALL of you curly gals need to follow suit.

Never fear! My newly-appointed resident curl expert, Jamie, is going to give all of you curly gals some fabulous tips.

(For the record, Jamie also received a quasi-mullet and believes she resembles this. (SHE SO DOES NOT.) Although, I’m currently lobbying her to visit California for Halloween, as we could totally rock Ann and Nancy Wilson.)

Inhale all of her curl wisdom:

Holy hairspray, Batman! I cannot believe I was called upon by the Grand Duchess Poobah of Hair Herself, Ms. Whoorl. It’s great to be here! Let’s get to it.

Curly hair can be difficult to deal with because every single person’s curls are different, and incredibly finicky. Then again, that is what makes curly hair so fabulous! Skipping the most obvious tips (like ask for a stylist who is experienced with curly hair, and NEVER EVER flat-iron your hair straight on a daily basis), let’s get started with my top tips for the corkscrew set.

I think it was the Byrds who sang “to every season, turn, turn, turn.” Your first step in taming your mane is to pay attention to the seasons. Obvious to some, not so obvious to others. What tames your frizzies in the sticky summer months might be the bonehead move that is making you look greasy in cold, dry December. Turn, turn, turn to your medicine cabinet and take a gander – are you using the same product all year long? If you must be consistent, great all-weather products include Aveda’s “Be Curly” Line, Bumble & Bumble Curl Conscious, Graham Webb “Brit Style” Whipped Wax (which I personally use and loooooove), and from your drugstore, John Frieda Frizz Ease Dream Curls, and Finesse Curl Control Mousse. Allow your hair to air dry in warmer weather, diffuse in the winter, and remember that you don’t need to wash your hair every day!

Tip Numero Dos: Give up the fight. Every curly haired girl must come to terms with the nature of her hair. Let your swirl pattern loose – don’t force a part when you get your hair cut, and whatever you do, DON’T poke at your hair after you’re done styling it. The more you touch it, the worse it will look. Also, it’s not recommended for curly girls (or guys for that matter) to wrap their hair up “turban style” post-shower/bath. Twisting your hair into a towel disrupts the curl pattern, yanks your hair about, and leaves you with who-knows-what for shape when all is said and done. Instead, flip your head upside down to blot most of the moisture out, ideally with an old t-shirt – terrycloth towels won’t get enough moisture out, and super chamois towels take too much. Some fantastic treatments and products to get your hair back to “home base” are: Ojon Restorative Hair Treatment (if you want to splurge), Biolage Daily Leave-in Tonic, Redken Fresh Curls Spray, and Back to Basics Curl Refreshing Shampoo/Conditioner.

Lastly, make sure to think positive! Curly haired girls never have to worry about getting caught in the rain for fear their hair will spoil. Curly haired girls almost never have to worry about ponytail ridges, and we can straighten when we want to! We can have our cake and eat it too!

If any of you have seen Jamie’s hair, you know to hang on her every word. She has some of the most amazing curls I’ve ever seen. Thanks, Jamie, for helping me out!

hair thursday makeover 18

The ONE night I blow off my duties for Gossip Girl, and it’s a rerun. The audacity.

Let’s continue the theme of DIY, only this time, our next participant literally DIYed herself. (As in, snip snip.)

Meet Ashley.

Ashley au natural:

ashley_wavy.jpg

And Ashley – straight:

ash_st.jpg

Ashley’s hair:

Thick, wavy and frizz-prone
Lots of volume
Usually takes around 10 minutes to style, unless she straightens which is 30-35 minutes (uses a wet-to-straight iron)
Once straightened, she can go a few days without washing
Finger combs while wavy, uses mousse
Recently cut her own hair (GASP!)

Ashley sent a great email about being a fairly recent college graduate and wanting a more mature look. (Which immediately conjured up visuals of Bea Arthur. How about “polished”?)

Some excerpts from Ashley’s questionnaire:

I have a preference for STYLE. That would be, make me look more mature/older!! (HUH?) Like you, I seem to look much younger than I am. (Already buttering me up – I like it.) I have had a similar hairstyle my whole life and since I recently graduated from college and am entering the working world, I’d love to look put together and polished. I don’t seem to have what it takes to make my hair look good (whatever THAT is?! products? tools? hair implants?!).

As for her current feelings about her hair:

I wear my hair up about 75% of the time. Maybe more. Either a messy bun or ponytail is my style of choice, I’m ashamed to admit. I think it’s mainly because I’m not happy with my hair. I like it when I straighten it, but is there any way around it taking nearly an HOUR!? If I run everyday, that means I have to shower and straighten it everyday. That’s like 2 hours total. I just can’t do that! It dries pretty well naturally, but if I go to sleep with wet hair…it’s curly city in the morning! When I put mousse in it, it’s SO easy (I let it air dry). But I don’t love having product laden hair everyday, you know what I mean? It’s not that my hair is too crunchy or anything, it just doesn’t feel as natural.

This situation sounds very similar to hair woes I’ve had in the past.

First off, the whole college into working world transition. I’ve been there. In fact, I was so determined to look “mature” after graduating college that I lopped off my completely healthy hair into a Posh bob (of course, it was 12 years ago. Posh was just a twinkle in the Spice Girls’ eyes at that time.)

Oh, but that wasn’t enough! I thought blond highlights would be sassy, yet stylish (?) and polished (?).

Something like this:

hair7.jpg

That’s my token happy drunk face, if you were wondering.

That hairstyle and the color involved HORRENDOUS UPKEEP. It wasn’t worth it. Why was I trying so hard when I had lovely hair to begin with? What can I say, it was my early twenties.

So, where am I going with all of this blabbering? Ashley doesn’t have to make huge changes to pull off a more polished look.

I don’t think Ashley should lop off her hair. 2-4 inches at most, grazing the shoulder would be ideal- giving her the most versatility possible. The focus needs to be on different styling methods. First off, Ashley has a great wave pattern. Some light layers starting in between her cheekbone and chin all around her head would give her waves and instant boost. (Please don’t do this yourself. PLEASE ASHLEY IBEGOFYOU.)

Long sideswept bangs could make a huge difference with little effort. Ashley already cut long bangs herself, but I think having a professional blend those front layers into her hair would be fantastic.

As for products, I would suggest using Aveda Be Curly or Pureology RealCurl. Both of these products are going to define the natural shape of Ashley’s waves while adding shine and smoothing frizz. I personally use both of these products on my waves, and I love them both.

If we focus on playing up Ashley’s waves on most days, the styling time will be kept to a minimum so she doesn’t need to spend hours after her runs (runs, heh). Of course, some days call for that polished look, and I would recommend using a flat iron for a sleek look, or a large-barreled curling iron for big bouncy waves.

Ashley, I am NOT a fan of the wet-to-dry flat iron. I think you need to splurge and get yourself a ceramic or tourmaline flat iron (eBay has great deals). I promise you, a ceramic flat iron will actually reduce the time you’ve been spending with the wet-to-dry iron. Why? Because you don’t need to dry your hair at all! If you are anticipating wearing your hair straight, wash your hair the night before, let it air dry or sleep on it, wake up looking like a hot mess, and get that flat iron out and get to work. It takes less time and is less damaging because you aren’t drying AND straightening.

Wow, I’m quite the chatterbox today. Let’s get to some photos.

ash_final.jpg

(Yes, these are recycled photos. I have no choice, as I spent all of my allotted time talking about the glory days.)

Okay, both have layers. #1 has heavier sideswept bangs, #2 is more similar to what Ashley is sporting right now. Both cuts will look fantastic when straightened (WITH A CERAMIC FLAT IRON, ahem) and they still give Ashley the versatility she needs.

Oh my, I have carpal tunnel. Please put me out of my misery and vote.