Loose Waves Tutorial (1 Curling Iron, 2 Ways)

loose waves video tutorial

Rumor has it some mighty fine individuals have tried my curling iron tutorial with success. (Can we call it the Whoorl Curl? Oh, come on…please? Humor me.) Take a gander at these hot mamas.

Three favorite ladies – Mandy, Rita, and Molly.

LOVE IT. Keep sending pics! (This reminds me of my Blunt Bang Brigade from a couple years ago. Remember these photos?) (Also, my bangs are down to my chin. WHAT IS UP WITH THAT?! Must remedy pronto.)

Besides photos of gorgeous ladies donning shiny waves, I have also received this particular question many, many times.

WHY RU SUCH A REGULAR CURLING IRON HATER??? WHAT DID A CLAMP EVER DO TO U? CLAMPZ RUULLLE.

Okay, maybe not phrased exactly like that. More like:

Can I achieve soft, loose waves with a traditional clamp curling iron?

The answer is a resounding YES, ladies. You can rock some really lovely waves by using a traditional curling iron with a clamp, and I’m going to show you how. In this video, I used a Sedu Revolution clipless curling iron on one side of my hair and a Hot Tools traditional clamp curling iron on the other side. Also, I spent more time demonstrating the technique this time around, so hopefully it will be helpful to those who need a a little more practice. Either way, your curls will look really lovely. Let clipless and traditional curling irons live in harmony! Peace be with you.

Enzo Milano vs. Sedu Revolution review here.

No-Clamp tutorial here.

How I Style My Hair (Products, Tools, and a Tutorial!)

easy waves with a curling iron

Hello hello! It’s been a few years since I’ve written about hair-related affairs, so I’m here with a completely updated hair routine for you. In this video, I will walk you through my favorite styling products (all green beauty, of course), styling tools, and demonstrate how I create my easy waves with a curling iron. (The video is featured on my IGTV which is a better mobile viewing experience, but here’s the YouTube version for those on a desktop.)

STYLING PRODUCTS

Andalou Naturals Citrus Shine Shampoo and Conditioner
True Botanicals Shampoo and Conditioner ($20 off your first order of $40+ with code WHOORLTRUE20)

Innersense Sweet Spirit Leave-In Conditioner

MO MI Styling Jelly
MO MI Texture Mist

Dr. Bronner’s Peppermint Hair Creme
Innersense Refresh Dry Shampoo

As always, the styling products I use are natural, non-toxic, and contain Organic ingredients!

STYLING TOOLS

L’ange Bijou Set – This is the set I bought because it includes the hair dryer, flat iron, and the interchangeable clipless curling iron with the 25mm and the 32mm barrel.

L’ange Hairdryer
L’ange 25mm and 32mm Clipless Curling Wand – depending on how loose I want the wave

Conair Ceramic Wood Boar Bristle Brush

Mixed Boar Styler Brush (for bangs)

I’ve since started using different styling tools – you can find my updated ones here.

Hope this was helpful! If you have any specific questions regarding how I care for and/or style my hair, let me know in the comments!

Other posts you might like:

How I create waves with a flat iron.

The best organic masks for your skin type. 


How To: Casual, Messy Waves

This post is sponsored by Sally Beauty. Thanks for supporting this site!

messywavecover

I’ve reeeaaally been into messy waves lately. Like seriously slept-on, super-loose, 3-day-old wave waves. Up until this year, I’d been doing my go-to clamp curling iron look, but it became a little too curled for my ever-changing taste. I wanted the ends to look a little grungier – like the waves you really get at the beach and can never be duplicated no matter how hard you try. So, after some hits and misses, I think I figured it out, and that means, yep, tutorial time, yo!

I only used two tools for this tutorial and no products. I didn’t want anything to make my hair seem too smooth. First off, I used the CHI Elite Ceramic Dryer and then the CHI Elite Ceramic Curling Iron.

iron

The CHI Elite curling iron is my new favorite, and I NEVER thought anything could surpass the love for my good ol’ trusty Hot Tools iron. The CHI Elite iron doesn’t seem to clamp down quite as hard as the Hot Tools, so it’s easier to achieve this look without snagging hair.

Let’s get cracking. First off, blow dry your hair. If you have wavy hair, you are already one step ahead of the game. You can dry your waves with a diffuser and then use the curling iron on random sections of hair to get this look.

messywave1_sm

However, I blew my waves out with a round brush for those of you who have straight hair or don’t particularly like your God-given waves. (I’m not super stoked with mine either.)

messywave2_sm

Once your hair is dry, section the top half off and clip out of the way.

messywave4_sm

The curling iron technique is the exact same as my video tutorial. (It’s super detailed if you are new to the technique.)

Clamp down mid-shaft.

messywave5_sm

And then rotate the iron 180 degrees. Release the clamp every so slightly and move down the section of hair. (Once again, watch the video if you are confused.)

messywave6_sm

Now HERE’S where things are different. Instead of working your way down the hair section with the iron, release the section with 3-4 inches remaining uncurled. As you can see below, the remaining hair never gets curled.

messywave7

What that does is create a bend in the middle of your hair, but the ends remain straight and not so perfectly curled.

messywave8_sm

Continue working throughout your hair, making sure not to curl the last 3 or so inches of your hair. You can also alternate the direction of the curl to switch things up.

messywave9_sm

After all the waves are finished, run your fingers through your hair and mess it up a bit. Pull on the ends to make it messy and imperfect.

messywave10

Voila! Super casual, messy waves. These even look better on the second and third day.

messywaves_final

Need some new styling tools for your arsenal? Over 100 styling tools are on sale at Sally Beauty’s Styling Tool Blowout during the month of October, and 100 randomly selected winners will receive a Sally Beauty gift card to purchase a styling tool of their choice. You will be automatically entered when you make any purchase in store at Sally Beauty or SallyBeauty.com using your Sally Beauty Club Card OR you may enter online here. Good luck and good hair.

Tracking Pixel

How To Create Loose Waves (The No-Clamp Curling Iron Method)

You know what I think you should do this weekend? Create soft, loose, and bouncy curls in your hair and make all the other ladies completely envious. Awwww, yeahhhh.

For those of you who go waayyyy back with me, my very first hair tutorial involved creating loose curls with a curling iron, but not using the clamp. (I did that post 5 years ago. Isn’t that crazy?!)

Well, five years later, I finally decided to update that tutorial with a video for Style United. (It was actually early last year, hence the shorter hair length.) Take a gander if you’re interested.

(Remember how my 2012 hair resolution is to embrace my natural wavy texture? Yep, stay tuned for another video about the favorite products I use when I’m not using a curling iron or hair dryer. Which I’m reeeaaaalllly trying not to use. That much. It’s HARD, y’all.)

How to Create Beachy Waves

How about we focus on an easy, less “perfect” look for the summer season?

This tutorial demonstrates how I wear my hair 95% of the time. I certainly enjoy a smooth and straight look, but I just don’t have the time (NOR THE ARM STRENGTH) to blow dry my hair on a daily basis. Plus, as I’ve said here numerous times, wavy/curly girls should celebrate their tresses!

(While this look is easier to create with naturally wavy hair, straight gals can achieve it too! Get your curling irons ready!)

Just remember, the key to this look is NOT trying to make the waves perfect. If you mess with the waves too much, your hair will end up looking frizzy. You are going for a loose, casual and summery vibe!

What you need.

products

Brush (mainly for bangs)
Beach spray (Some of my favorites here.)
Wax or pomade
Wide-toothed comb
Sock Diffuser

Okay, kiddos! Wash and towel-dry your hair. Comb through tangles with a wide-toothed comb.

1

Separate your bangs from the rest of your hair.

2

Blow dry your bangs in the opposite direction that you want them to lay.

3

I’m telling you, it works!

4

Flip hair over and and give it a good scrunch.

5

Spray beach spray all over the hair.

6

Everywhere.

7

Give hair a nice scrunch again. (This will help create volume and texture for less wavy gals.)

8

I personally like the way my hair air dries with the beach spray, but if I don’t want to deal with a damp head of hair, I will use my Sedu 4000i hair dryer with the sock diffuser attached. If your hair isn’t terribly wavy, you will want to use the diffuser to help create some bends and volume throughout the hair.

With your hair dryer on the lowest heat setting, diffuse your hair while gently scrunching.

10

To create more defined waves, twirl your hair and let the dryer work it’s magic.

9

Tada! Loose, beachy waves.

b4iron

Now, if your hair needs a little more oomph OR you see some spots that are a little too freaky/frizzy, grab your curling iron. My Hot Tools 1-inch is a godsend. (In my humble opinion, the cheaper gold-barreled ones are WAY better that the more expensive ceramic ones. The curls look nicer and stay put longer.)

Wrap random, small pieces around the barrel of the curling iron without using the clamp.

ciron

I usually curl 1-2 small pieces on each side. If your hair is on the less wavy side, you might need more. Remember, you are going for beachy and casual! Don’t overdo it!

ciron2

Grab your wax orpomade. Rub a tiny amount between your fingers and separate some of the waves for a piecey look.

nano1

nano2

And voilá! Beachy waves in about 15 minutes!

last_ps

Low Maintenance Hair: Side Bangs Tutorial

Katie is a public interest lawyer living in Chicago with her husband, a basil plant named Boris, and a staggeringly large collection of cookbooks. She has very strong feelings about public schools, letterpress stationary, and beer. (And hair, obviously.) You can also find her at her personal blog, Pseudostoops.
text

In my last installment, I counseled those seeking low maintenance hair to consider side bangs.

I have had side bangs for several years now, and to be totally honest, they did not start on a good note.  (I tried to find a picture of Katie’s Bangs: The Early Years to share with you, but mercifully I’ve switched computers since then and all those pictures seem to be lost.)

The woman who cut them was, in retrospect, clearly a trainee, and English was not her first language, and when I said “I have a cowlick on the side there” she looked at me inquisitively and said “cowlick?”

(Note: if any of these conditions occur at the salon where you are considering getting side bangs for the first time: RECONSIDER.)

Six years later I still have side bangs, and I’ve learned a few things along the way.  Today, I will share that wisdom with you in the form of a Side Bangs Tutorial.  (Some of you hair experts out there are doubtlessly thinking, “Really?  A tutorial? For how to wrangle bangs?  What kind of amateur hour is this?” To which I say, “For some of us not blessed with intrinsic hair genius, this stuff is NOT OBVIOUS, and if I help even one person through this tutorial I will feel I have done something good here.”)

Cutting guide

The first key to successful side bangs is getting them cut properly.  If you’re new to the world of bangs, ease into it by asking your stylist to cut them long and side-swept.  When they’re longer, it’s easier to sweep them in with the rest of your hair, easier to pin them back if need be, and if you end up hating them, they’ll grow out faster.

If you have a cowlick, you’ll want to make sure that the cowlick is entirely contained within the bangs.  So, if your cowlick is slightly on the right side of your forehead, you’ll want to part your hair on the left, cut some sweep-y bangs, and have them sweep to the right, thus covering up the cowlick.  If the cowlick is on the left side of your forehead, part hair on the right, sweep bangs to the left.

Everyday blow dry
Here is my wet hair in all its natural glory.

Close up reveals both cowlick AND a widow’s peak! Bonus!

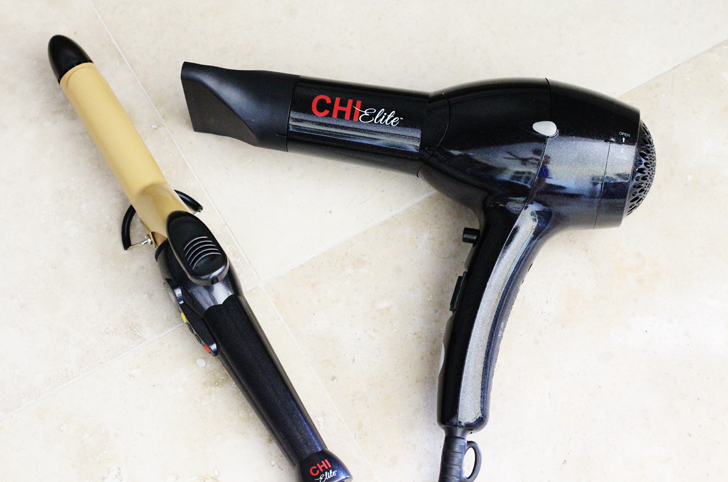
To achieve perfect side bangs, you will need:

Hair dryer, round brush, and some kind of cheap-o styling gel.  (I use Garnier Fructis styling milk, which costs a whopping $4 at the grocery store and de-frizzes without leaving any greasiness or stickiness at all.  Highly recommend.)

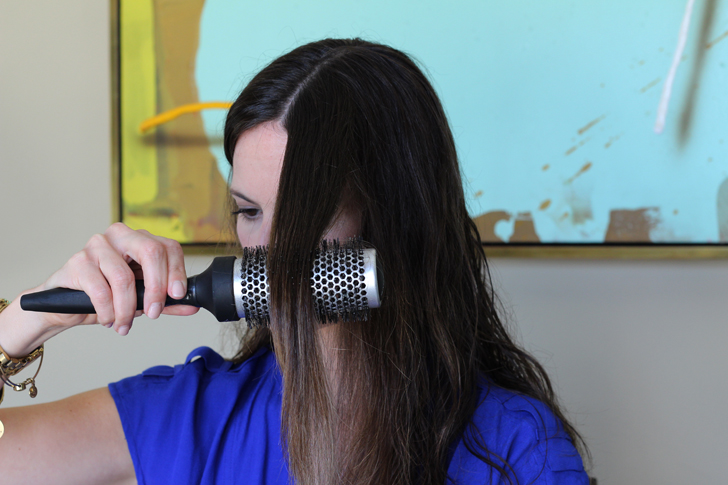
Take your wet hair and maybe even pin back the main section to keep it out of your way.  (Bangs should always be dried first.)  With your fingers or a comb, separate out the chunk of hair around your face.

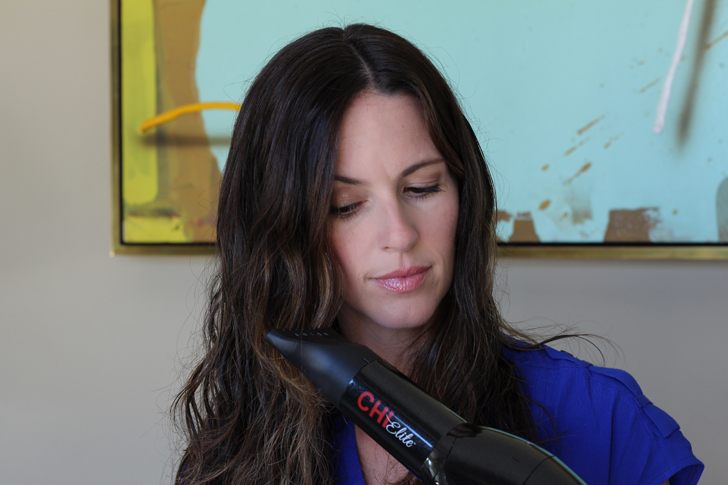
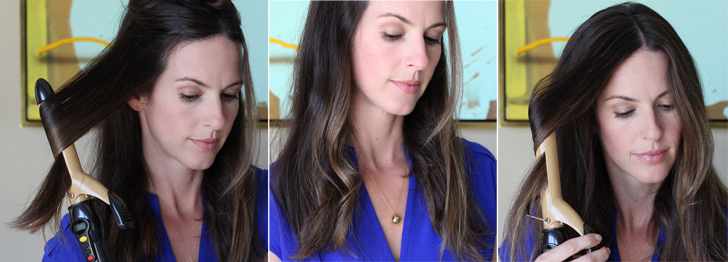
Brush the bangs off to one side and, holding them down gently with the round brush, blow dry with the dryer pointing downward.  (Turns out this is awfully hard to do one-handed while trying to take a picture.  Imagine the hand holding the camera actually holding a brush and gently pinning the hair against my forehead.  Also try to picture me using eye cream or something to address the serious puffiness situation we’ve got going here.)

Sweep the bangs across to the other side of your forehead.  Repeat.

Go back and forth a couple times like this, blow dryer always pointing downwards. Maybe, for good measure, brush the bangs straight down, too.

Finish by sweeping them to the angle you want to wear them.  Point the dryer at them for several seconds, then turn off the dryer, brush through, and, if you are paranoid about them shifting, spritz them with a little spray.  I do not do this step, as I loathe hairspray.  The whole thing, start to finish, takes about 2 minutes. Ta da!

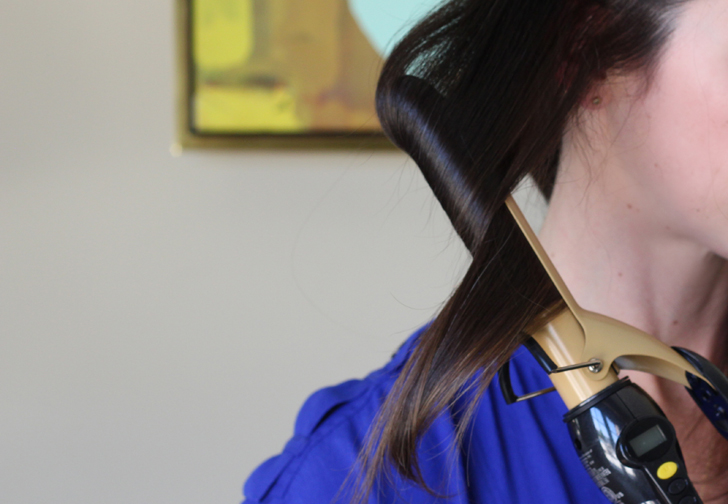
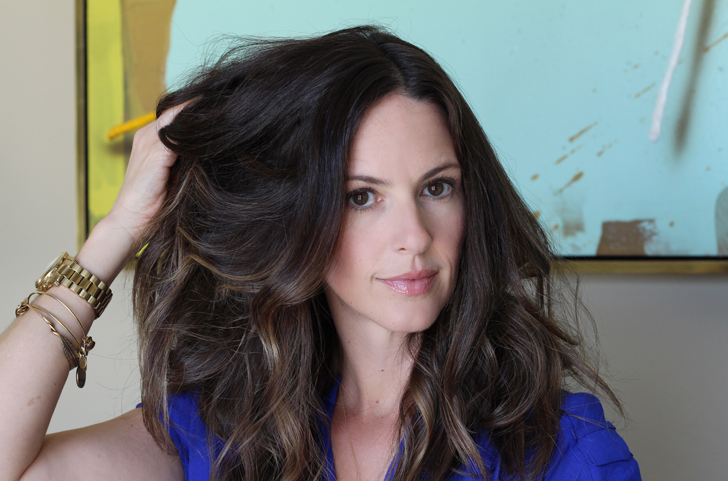
Final note:  Also, if you have wavy hair, or a cowlick on your forehead, you must never, ever, EVER do this:

It will cause your hair to puff up and curl under and get all big and you will spend the rest of your day fighting the urge to peg your jeans and belt out Poison lyrics.

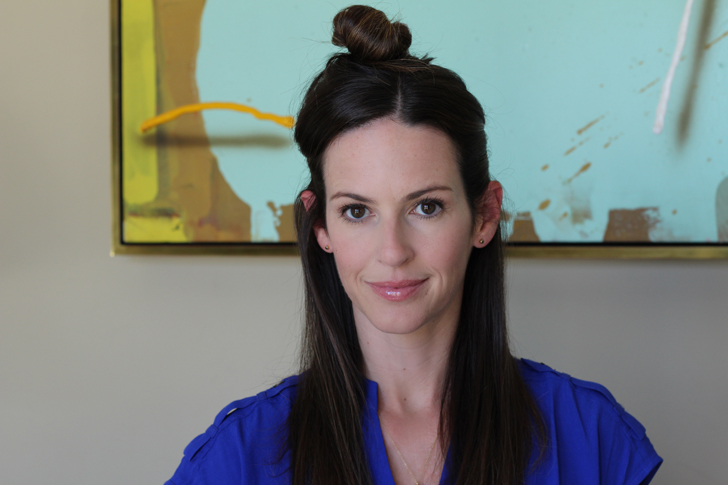
Once your bangs are dry, you have many options.  You could blow dry the rest of your hair, or you could do what I do most days and just toss it into a loose bun, which I take down an hour or so later.  Loose bun creates gentle waves, plus no blow drying.  Bonus!

Emergency circumstances

Sometimes, something will go awry, and your bangs will be unwieldy.  In those circumstances, there are a few things you can do.

  1. Flat iron.  If you have one, a flat iron can save your butt in those times when your bangs aren’t cooperating.
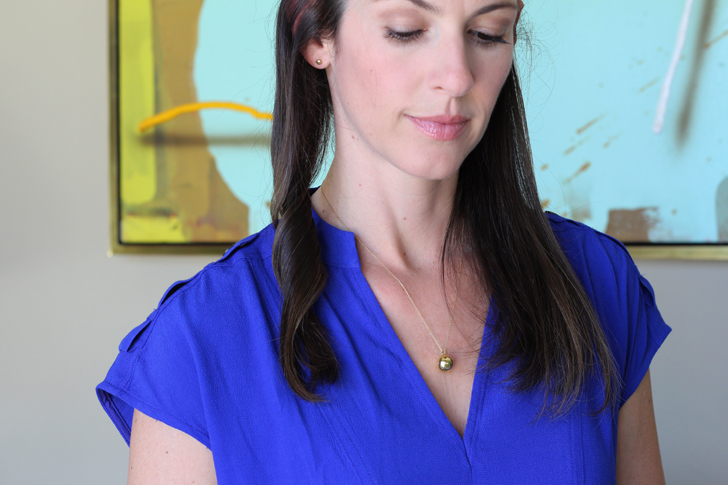
  2. Bobby pin.  Easy, cheap, effective.  Twist your bangs gently, pull back at an angle, pin.

Look! Simple, classy, intentional-looking hair!

(I also use this trick when it’s cold and I have to wear a hat for my commute OR when it’s hot and there’s a risk of forehead sweat. I pin my bangs back away from my forehead for my commute, and then remove the pin when I get to work.  Pinning them keeps them looking fresh and straight.)

There you have it- more than you ever wanted to know about side bangs, and how they truly can be low-maintenance.