I just returned home from Mom 2.0 Summit where, once again, I was floored by the quality of bloggers, marketers, and hello, inspiration. (I also was floored by how late I stayed up on the last night, which forced Kristen and I to do the walk of shame the next morning. Crikey.)
I spoke Saturday morning with Helen Jane Hearn, Kristen Howerton, and Heather Spohr on a panel entitled, “A Creative Approach: Brilliant Ways to Break Free of the Typical Sponsored Post,” and thought I would share some of the information I specifically covered, which was primarily on creating visual images and graphics for your posts.
Although I still firmly believe the written word is paramount (you simply must tell your story, especially when working with brands), the fact remains that there is quite a shift happening with the way people acquire information on the internet. Instead of text-based information, people are searching for visual-based information.
What does this mean to you? Well, adding photos and graphics to your posts is, um, fairly important.
Before I delve into my favorite resources for creating great graphics for all posts, including sponsored ones, I want to share something I heard at LuckyFABB last month that really resonated with me.
Live and create deliberately. Stop “creating content,” and start telling stories.
I think a lot of us get caught up in creating posts that we think our readers will love or will be pinned a gazillion times or will receive tons of link love, and there’s nothing inherently wrong with that, as long as YOU truly feel passionate about that subject. BUT If you are creating a post solely based on what others might think of it (or do with it), you aren’t living and creating deliberately, and that’s where a disconnect starts to happen. Readers feel it. You feel it. No bueno, folks!
So, in regards to sponsored posts, you must learn to say no when it isn’t a perfect fit. You simply must love the companies you are collaborating with. (You should have seen me geek out when I met the Creative Director for Rivet + Sway this weekend.) You must tell stories, whether they be written or visual. Write about what you love, things that you love, and the universe will be happy happy happy. Peace be with you and you and you.
Let’s dive in, shall we?
TAKING PHOTOS
I am not a professional photographer, no sirree bob. However, I do believe a few of these simple tips will make or break your photos.
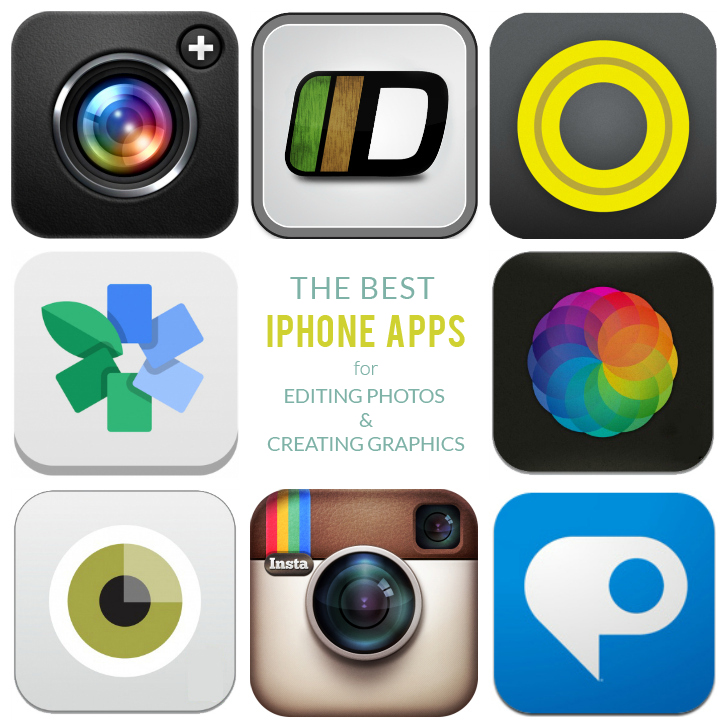
1. Fancy camera, schmanchy camera. You don’t need an expensive camera to create beautiful photos. (Have you perused Instagram lately?) The vast majority of photos I take are with my iPhone and post-processed with my favorite photo editing apps. For me, it’s more important to capture the feel of the moment than create the perfect depth of field. (Although, that’s nice too.) What are my favorite photo-editing apps for the iPhone, you ask? Almost there!
2. Keep it simple. Reduce background clutter. I think my biggest pet peeve is a photo with a cluttered background. You might take the cutest photo of your child ever, but if he/she is standing in your living room with a messy laundry basket and/or a pile of jumbled up power cords behind him/her, you’ve lost me to the clutter. Please be sure that when you take a photo, you take notice everything within the entire frame of your photo. Try shooting against a simple wall or go outside and let nature do its thing. In regards to sponsored posts, I can promise that while YOU might not notice a cluttered background, the company paying you to write the post definitely does.
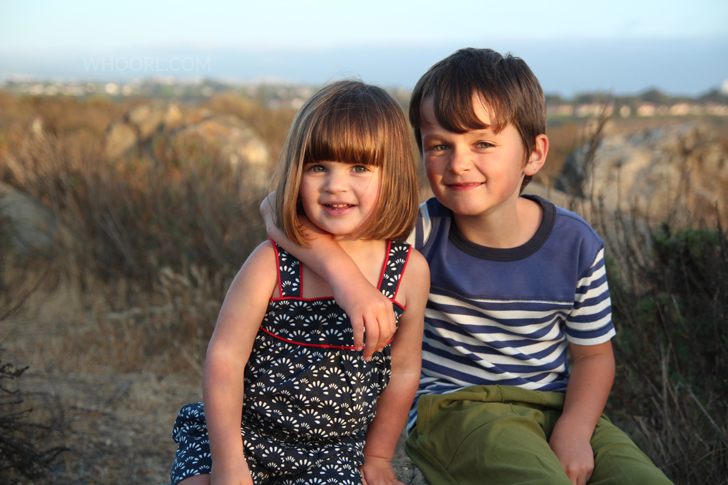
3. Lighting – You could spend days/months/years learning how to perfect lighting, but I’ll just say this. Natural light rules, really really really try to never use a flash, and get outside and take advantage of the golden hour as much as possible.
No post-processing was needed for that photo – I just let the gorgeous sunlight do its thing. Repeat after me, gooolden hour.
EDITING PHOTOS AND CREATING GRAPHICS
I’m going to split this into three categories: Apps, Photoshop, and online editing.
First off, my favorite apps.
1. Camera Plus – You can use this app to edit, crop, add effects, but I really like the “scenes” on the app. I find myself using the “backlit” and “shade” scenes frequently, especially when I want to enhance the photo quickly, without spending too much time on it.
2. Diptic – Great app for creating collages of multiple photos. You can choose from tons of different templates, and the interface is very easy to use.
3. Over – You don’t need to use Photoshop or an online editing program to add text to photos anymore – just use the Over app right on your phone. Super easy, and I’m impressed with the choice of fonts. (Combine Diptic and Over and you’ve got an image perfect for pinning.)
4. Snapseed – This is probably my favorite editing app because you can tweak your photos very selectively. (Good for us OCD photo editors.) You can adjust white balance, saturation, contrast, and lots of other facets specifically, as well as my very favorite, straightening a photo. You know when you take a photo and the angle is off ever so slightly? Like the horizon line or a wall corner looks tilted? Yeah, you can fix that. Best thing ever. You can also add filters, use the automatic feature, and add frames. Good stuff.
5. Afterlight – This one was just introduced to me, but I’m already loving it. So many super filters and textures.
6. VSCO CAM – Once again, more filters to choose from, but these are very elegant and use minimal processing.
7. Instagram – Not a robust editing app, but some of the filters work in a pinch. We all love Instagram though, right?
8. Adobe Photoshop Express – Good for quick edits and retouches.
You definitely don’t need all of these apps, but they each bring a little something different to the table. I promise you’ll find your favorite from the list, though.
Photoshop
For those of you who use Photoshop, I can’t recommend Pugly Pixel enough. Katrina is a Photoshop and design dynamo, and she creates tons of gorgeous templates to use in your posts. Some are freebies, and some require a paid membership, which honestly, is ridiculously reasonable considering what you get. ($5 for 30 day access to downloads!)
Here are some examples of images I’ve created with Katrina’s templates and brushes. 1. 2. 3. 4. 5. 6. 7. 8. 9. 10.
Online Editing Platforms
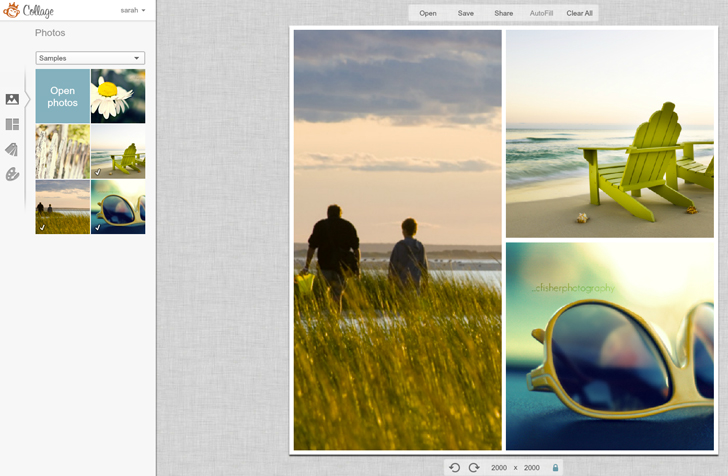
If you don’t use Photoshop, Pic Monkey is a great website for editing photos and creating collages with graphics and text. Even though I’ve used Photoshop for the past 6-7 years, I find myself using Pic Monkey for a lot of my collages lately. Best part? It’s free. (Although you can upgrade to the Royale membership for extra perks, which I did.) Some examples of my Pic Monkey graphics are 1. 2. 3. 4. 5.
Phew! I think that about covers it for today. What are your favorite tips and tricks regarding post images? Also, please feel free to ask me about any apps or websites I’ve mentioned.


Megan @ Mama Bub
May 6, 2013 at 12:06 pmThanks for the Over recommendation! I already love it.
Angella
May 6, 2013 at 12:27 pmYour session was AMAZING, and I’m so glad you posted it for those who couldn’t be there. Miss you guys!
whoorl
May 6, 2013 at 12:35 pmThanks, Angella! Glad you made it home safely!
Jessica
May 6, 2013 at 1:32 pmThanks for posting! This is super helpful – especially diptic and over. And I love pugly pixel but have never thought about buying her templates. I have photo shop but I’m new at it and so until I have time to sit down to hours of youtube videos on how to use it, I use picmonkey. Just out of curiousity, on your lipstick post – how did you crop the circles in picmonkey? I’ve been looking for the tool to do that!
whoorl
May 6, 2013 at 1:40 pmYes, when you create a collage in Pic Monkey, after placing the photos, choose the little paint palette icon on the left, and then move the “corner rounding” tool right and left to make the photos into circles!
Jessica
May 6, 2013 at 1:44 pmThanks! :)
Mamaintheburbs
May 6, 2013 at 1:42 pmThis was a great post! Thank you! I have a question about pic monkey. The image you posted with the lipsticks, were those your photos? Also I’m about to launch my new blog, are you allowed to post YouTube videos on your blog that aren’t yours? Do you have to credit the full source or just you tube? What about graphics on the web, is there websites that have “free” stock photos or do u have to buy them? Then do you credit the website?
Thanks so much!
Kelly
Kerri Anne
May 6, 2013 at 3:27 pmThis post is rad. (As are you, duh.)
I’ve been rocking Afterlight since Matt introduced me to it via a photographer friend on Instagram (LOVE it). I never end up using any of the filters, but the post-processing options are pretty fantastic.
I also verily dig the point(s) you made about living and creating deliberately. A to the men.
Jennifer
May 6, 2013 at 10:54 pmWhat a great post! I cannot wait to try Pic Monkey. it kind of seems like a one stop shop, no?
As a blogger newbie, I am thinking of going to a conference in 2014. Is there one you think would be the best investment of my time and funds?
Asha Dornfest
May 14, 2013 at 7:43 pmJust wanted to thank you AGAIN for this post, Sarah. So very helpful.
http://www.przewodelektryczny.elektrownia-domowa.eu/
May 15, 2013 at 7:49 pmGood article! We are linking to this particularly great
article on our website. Keep up the great writing.
Sharon @ Discovering Blog
May 23, 2013 at 4:02 pmAhhhh! Thank you a million times over for these great ideas! I just played around with Pic Monkey and loved it – quicker to tinker with images than PS. You just gave me a million ideas, and I thank you for your generosity. You just got me excited to create :)
tartaglino
July 18, 2013 at 9:31 amHowdy my best mate! I would like to say that this article is incredible, great published and are avalable with virtually all essential infos. I’m going to peer much more blogposts in this way .
Www.Blogigo.com
July 27, 2013 at 9:01 pmHello, just wanted to say, I loved this blog post.
It was practical. Keep on posting!